This walkthrough takes you from an empty install to a working board with a teammate on it.
1. Create the board
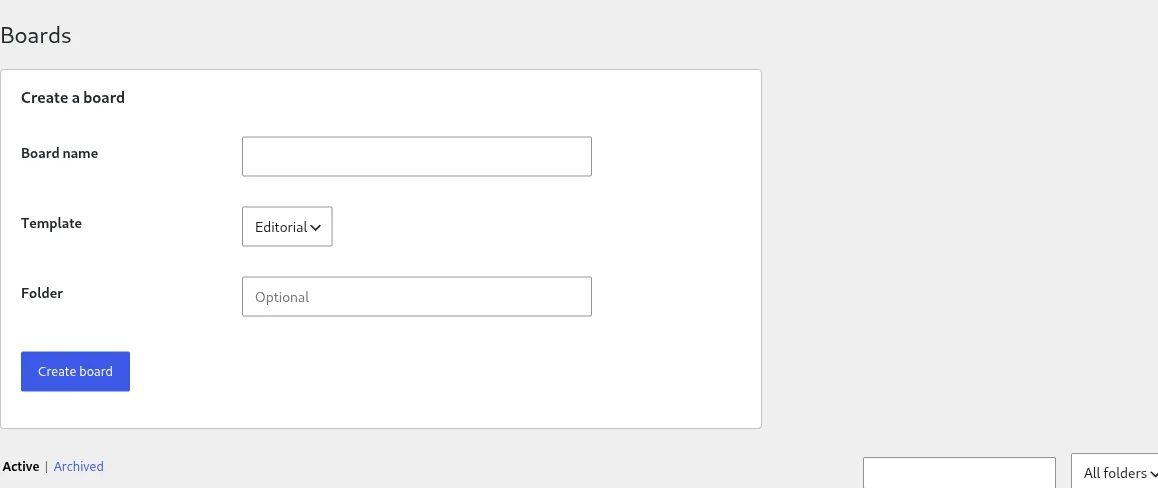
- Go to KanbanWP > Boards.
- In the Create a board form, type a Board name.
- Pick a Template: Editorial, Client, Sales, Bugs or Blank. The template creates the stages and labels for you. See Templates.
- Optionally enter a Folder to group boards.
- Click Create board.
The new board opens right away. The Blank template gives you three stages: To Do, Doing and Done.
2. Add tasks
In any stage, click + Add task at the bottom. Type a title in the Task title… field and click Add. The card appears in that stage.
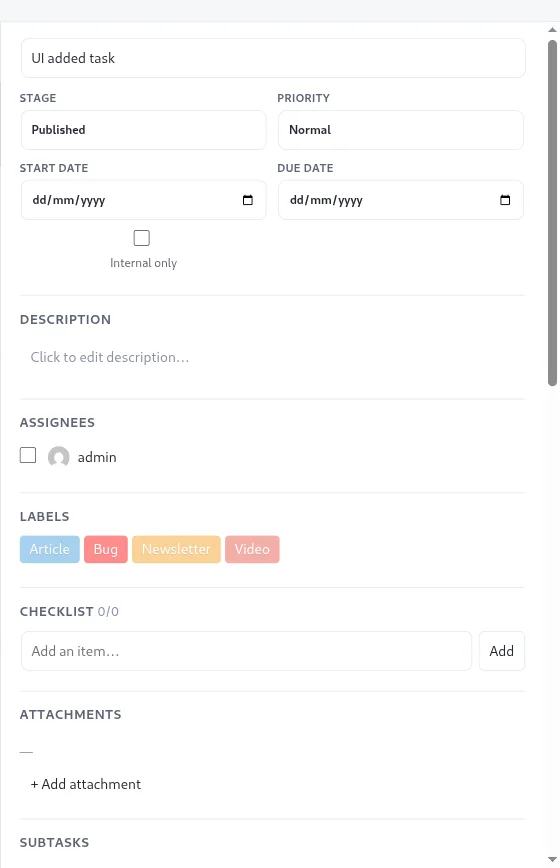
Click the card to open the task panel. From there you can set the priority, start and due dates, assignees and labels, write a description, and add a checklist.
You can also add a task from the Calendar view by clicking a day. That creates a task due on that date in the first stage.
3. Move cards
Drag a card and drop it in another stage, or reorder it inside the same stage. The move is saved as you drop it. A drop on a stage over its WIP limit still works, but the stage shows an “over WIP limit” warning.
4. Invite a member
- Click the member avatars in the board header to open Manage members.
- In the User ID or email field, enter the WordPress user ID or the email address of an existing user.
- Choose a role: Viewer, Commenter, Editor or Admin.
- Click Add.
The person must already have a WordPress account on your site. KanbanWP does not send a WordPress invitation. Board members work on the board from the front end, using a page that embeds it. See Embedding boards.
You can change a member’s role or remove them from the same popover.
5. Try a filter and a view
Use the search box or the Assignee filter to narrow the board, then switch tabs to see the same tasks as a list or a calendar. See Views.